Tuesday, August 7, 2012

recipe: banana upside down cake

it was a perfect storm; i was in the mood to bake, craving something sweet, looking for a fun activity to do with nia and we had super soft/need-to-use-soon bananas.

whenever i'm feeling adventurous i always go to my trusty epicurious app and type in whatever ingredients we have lying around. a few years ago i (humbly) mastered a pineapple upside down cake, so a banana twist seemed like the best  choice.


banana upside down cake

for bottom:
1 c. firmly packed light brown sugar
6 TBSP unsalted butter (room temp)
2 ripe bananas, sliced (although i used super soft/past ripe ones, ripe, firm ones would definitely yield better results)
(although the recipe doesn't call for it, i generously sprinkled the bananas with cinnamon)

for cake:
1 1/2 c. cake flour ( if you don't have cake flour, use 1 1/4 c. all purpose mixed with 1/4 c. corn flour)
3/4 tsp. baking soda
1/2 tsp. baking powder
1/2 tsp. salt
1 c. mashed bananas
1/2 c. buttermilk
1 tsp. vanilla extract
1 1/4 c. sugar
1/3 c. vegetable shortening (i used equal amount of butter instead)
2 eggs (i only used one)
(again, although it doesn't call for it, i added about 2 TBSP of cinnamon to the batter)

preparation:

Position rack in lowest third of oven and preheat to 350°F. Using electric mixer, cream brown sugar and butter in medium bowl until well mixed. Spread brown sugar mixture over bottom of 9-inch square baking dish with 2-inch high sides. Arrange banana slices atop brown sugar mixture, covering completely. Set cake pan aside.

Combine flour, baking soda, baking powder and salt in small bowl. Mix mashed bananas, buttermilk and vanilla in another small bowl. Using electric mixer, cream 1 1/4 cups sugar and shortening until fluffy. Add eggs 1 at a time, beating well after each addition. Add dry ingredients alternatively with buttermilk mixture, mixing until just combined. Pour batter over bananas in pan. Bake until cake pulls away from sides of pan and tester inserted into center of cake comes out clean, about 1 hour 5 minutes. Transfer to rack and cool slightly. Turn cake out onto plate. Serve warm or at room temperature.
a few things to note:
you could definitely use less sugar, as this was a super sweet cake. also, i think i could have used a bit less butter and sugar for the topping (bottom when you bake) as it was too thick and you really just need enough to cover the sliced bananas for them to caramelize. the top/bottom didn't come out as great as i had hoped, but the actual cake was delicious!

Wednesday, July 11, 2012

film project

how amazing does this film look? i can't wait to see it (especially since my dear friend camila is producing it)

check it out here at kickstarter


Monday, July 9, 2012

DIY color block chair

i found this sweet little chair at a thrift store the other week. the size was perfect and nia got cozy in it right away (when we were still in the store!) best part about it, it was only $7!

so i took it home and with a little elbow grease, help from martha and sandpaper + foam brushes it came out lookin' pretty sweet!


i first washed the chair, as it was looking pretty grubby. once it was dry i sand papered off the train stencil and gave the rest of the chair a quick sanding so the paint would stick better. 


do you not just love these colors? i had such a hard time choosing even what color scheme to go with. 


i went with granny smith, pool and scallion paint colors and LOVED how they looked together.  it took about 3 coats, but the paint dried pretty fast and the whole project took me about 3 hours (including color debating time)


and nia loves it!


city or not?

just saw this great little guide here via one of my favorites. makes me miss my commute to work (did i really just say that?!)


Sunday, July 8, 2012

DIY: rainbow blocks

i'm pretty serious about nia being surrounded by plenty of old fashion, wooden + classic toys. i think it just makes for more creative minds. i really wanted to buy one of these boikido sets, but they were just too expensive to justify. 

so i was super excited to try to create our own wild set from the cheaper, yet bland educo ones

  
  (educo) 
 (boikido)


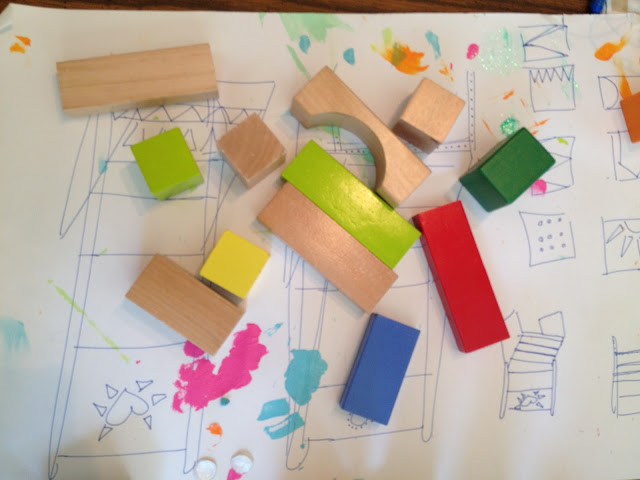
here are a few of the blocks before. they were pretty boring in person.


i got out a few of my favorite martha paints (you can buy them here in tons of different colors). i had to narrow down my choices in color, so i picked the brightest ones that would coordinate well together on the already existing basic rainbow colors. 


the peppermint glitter paint was perfect for adding shimmery sea spray to my painted wave blocks and just adding a thin, single coat to a few solid blocks was perfect way to jazz them up a touch.

and after many coats, drying time (which was extra long with all this humidity lately) and overtaking the dining table, here was my finished project...


overall i'm pretty happy with the results. i did decide to leave a few of the natural wood color ones plain. if i had all the time in the world i would have experimented more with design ideas and given all the blocks the proper 4+ coats they needed, but i had to keep a curious toddler from the table full of paint, blocks and glitter. c'est la vie.